Creating a software prototype is one of the most effective ways to bring an idea to life. It is one of the most important steps in software development before actually committing to full-scale development. Software prototyping acts as a visual and functional representation of your concept. It allows stakeholders to explore features, provide feedback, and identify potential improvements early in the development process. Creating a robust prototype allows businesses to save time that they would otherwise spend in exploring flaws and making improvement in the software. Additionally, software prototyping also helps reduce costs and minimize risks. All in all, it ensures the product aligns with user needs and business goals. So, if you are pondering how to create a software prototype, then keep reading this post.
In this step-by-step guide, we’ll walk you through the important steps you will need to take to create a software prototype and transform your vision into a practical, user-focused solution. So, without any further ado, let’s get started…
Before we delve into the steps to create a software prototype, it is crucial to understand what exactly it is and why developers are so concerned about it. Here we go…
What is a Software Prototype?
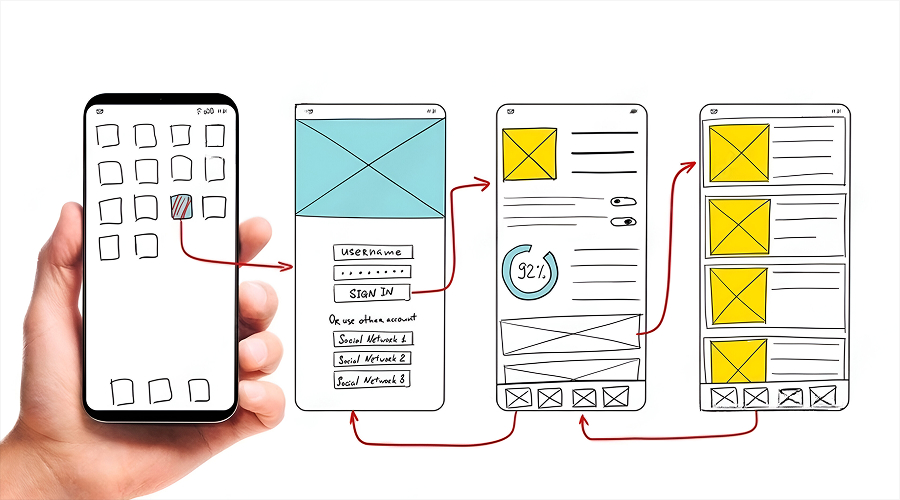
A software prototype is a simplified, interactive model of the product that you plan to develop. It includes all the core features and flows without being fully built. A prototype can be in the paper sketches that show sequences of screens or pixel-perfect interactive mockups that feel almost real. It is basically the step in which you bring the sketches that are in your head to life, either in the form of sketches or interactive mockups. Software prototypes help you explain exactly what you are going to build and take feedback from stakeholders and make improvements without the final product being developed. Creating a good prototype is crucial to save a lot of your time and effort. Moreover, it should be able to answer the hard questions early in the process so that later there is less work and more satisfaction. If you are planning to build one for your project, partnering with a trusted software development company can help you transform your prototype into a successful, fully functional product.
Wondering why protype when we can directly start the process of development?
Read ahead for the answer….
Why Bother to Create a Software Prototype?
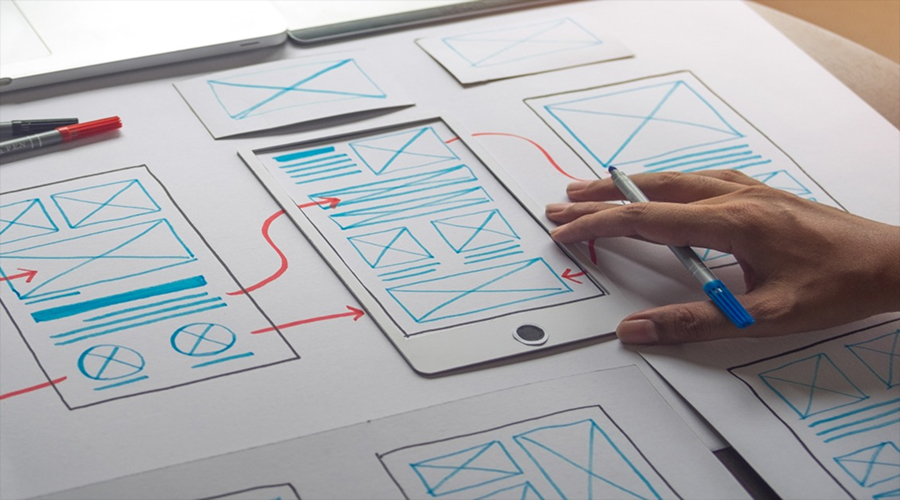
Undeniably, you can start the process immediately after you get the requirements. But how do you explain what exactly you are going to create finally until you know what exactly you are creating? Of course, you have an idea in your head and a prototype is just transmuting the idea or sketches into life. That’s all.
Pondering how it all Benefits You?
Well, it benefits you tremendously. Here is how…
- Answers Hard Questions Early: First of all, creating a prototype allows you to find answers for the hard questions. Questions such as Is this useful? Is it usable? Will people pay for it? And so on…
- Economical & Faster: Catching flaws before engineering investment saves months and large budgets.
- Test Assumptions: Lets you validate user needs, explore usability problems, and refine product-market fit.
- Align Stakeholders: Alignment of stakeholders is a MUST when developing a product. Every entity involved in the process of software development, including client, developers, designers, product managers, and engineers, get time to understand and agree on look-and-feel and functions.
- Speeds Up Development: Software development process is most of the time undefined. Sometimes it takes a lot of time to create a product, depending on the functionalities and user needs. Moreover, if the team’s alignment is not proper, it again adds to the delay. A software prototype allows developers to make engineering estimates more accurate and reduces rework.
- Helps Reduce Uncertainties: Software without a prototype can be subject to failure or multiple revisions. This, of course, delays the process. Having a good prototype allows developers to explore bad ideas of flaws in an early stage and make necessary improvements there and then. This significantly reduces uncertainty in the process.
If you’re planning to build a new product, investing in Product Prototyping Services ensures that your ideas are validated early, saving both time and money while aligning all stakeholders effectively.
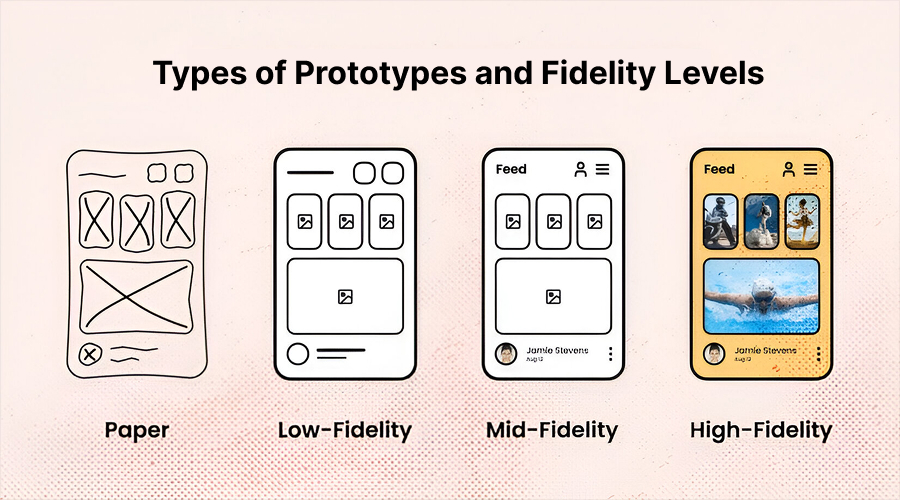
Types of Prototypes and Fidelity Levels
- Low-Fidelity (Lo-Fi): Paper sketches or grayscale wireframes. Known for being fast and cheap. They are often considered ideal for rough flows and concept validation.
- Mid-Fidelity: Clickable wireframes with basic layout and navigation, but have minimal styling. They are often considered good for basic usability tests.
- High-fidelity (Hi-Fi): Realistic UI, content, and interactions. They are best for stakeholder demos and final usability validation.
- Functional Prototype: Functional Protypes, as the name says, are the ones that are built with code (usually React or Flutter). They are often connected to lightweight backends. They are often created when developers need to validate performance, integrations, or real data flows.
Which Fidelity to Opt For?
Well, the choice of fidelity totally depends on your requirements and the stage you are in. Picking something just because it looks great or others are using it doesn’t make any sense. You should pick the one that will work best for you and help you learn faster. If you find yourself stuck, then here are some questions that you can ask yourself to make the best choice. Take a look…
- What is the main goal of this prototype?
- Who is the target audience for this prototype?
- What resources (time, budget, and tools) are available?
- How much feedback do we need at this stage?
- At what stage of the project are we currently?
Choosing the right fidelity becomes easier when you have the answer to these questions.
Tools Required for Creating a Software Prototype
Well, the choice of tools totally depends on the type of prototype, the stage of development, and the complexity of your project. Here are some of the most commonly used tools in prototyping; take a look….
- Low-fidelity tools: Sketches, Paper, Balsamiq, Wireframe.cc (for quick idea validation).
- Mid-fidelity tools: Adobe XD, Figma, InVision (for layouts & basic interactivity).
- High-fidelity tools: Axure, Proto.io, Marvel (for realistic user experiences).
- Testing & Collaboration: Maze, Lookback, Miro, Zeplin (for usability & developer handoff).
- Real Data or Integration Tests: React, Vue, Flutter (For lightweight coding).
- Complex Animations & Micro Interactions: Framer or Principle (for advanced micro-interactions or high-fidelity interactive prototypes).
So, these are the tools commonly utilized in the process of creating software prototypes. You are advised to pick tools that fit your goal, team skills, and your fidelity requirement. You don’t have to learn a new complex tool; the ones outlined here are pretty good to get started.
Let’s now take a look at the step-by-step guide for creating a software prototype. Here we go…
Step-By-Step Guide to Building the Software Prototype
Here are the steps, along with a realistic timeframe, you can follow in order to create a good software prototype. Whether you are planning to build a mobile application or a web dashboard, these steps will help you validate assumptions and reduce risk before actually getting started with your software development project. Take a look…
1. Define the Scope and Outcomes
Timeframe: 1–2 days
The process of creating a prototype starts with defining the scope and outcomes. Here is what you need to do to begin with:
- List the critical user journeys.
- Identify the features that you need to test your hypothesis.
- Define success metrics: qualitative (user feedback) and quantitative (task success rate ≥ X%).
Deliverable: short one-page brief with flows, goals, and metrics.
2. Do Some User Research (Lightweight Though)
Timeframe: 3–7 days at the max.
Knowing your users prior to development process is essential for the seamless flow and of course, the outcomes. So, if you don’t already know your users, there are some activities that you can run quickly:
- 8–10 short interviews or contextual inquiries to confirm pain points.
- Competitive Analysis. Look at what similar products are already doing and what exactly they miss because of which users are reluctant to use them.
- Build 1–2 personas that represent core users.
- Running these quick activities will allow you to gain insights on your product and you will be able to develop a product that stands out. Also, you are advised to refrain from designing for imaginary users.
Deliverable: Summary of user needs and 2 personas.
3. Map User Journeys
Timeframe: 1–2 days
Once you know your users, it’s time to create user journey maps for each flow. Make sure to keep your maps as simple as possible. What to keep in mind when creating the flow:
- Steps the user takes
- Decisions
- Pain points
- The minimum UI needed
Deliverable: properly organized journey map.
4. Prioritize Features
Timeframe: 1–3 days
Once you have created user journey maps for each flow, it’s time to prioritize features. Consider marking “must-have” vs “nice-to-have.” You can use the MoSCoW method
The MoSCoW method is one of the most popular prioritization techniques. It is often used in software development, project management and business analysis. This method helps software development teams figure out which features are most important and must be included in the product. The term MoSCoW stands for the following:
- M – Must Have: Critical requirements that cannot be missed at all as the success of the project depends on them.
- S – Should Have: Important requirements that are not critical for immediate delivery but add significant value.
- C – Could Have: These are nice-to-have features that, of course, can enhance user experience but are not essential at the moment and will not impact the overall performance of the product.
- W – Won’t Have: Features of the lowest priority in the initial stage of development. They won’t definitely be delivered in the current release, but might be considered in the future.
Deliverable: prioritized feature list.
5. Sketch & Wireframe
Timeframe: 2–7 days
- After prioritizing features, it’s time for sketching and wireframes. Here is how to begin:
- Begin with paper or digital sketches to explore layouts and options.
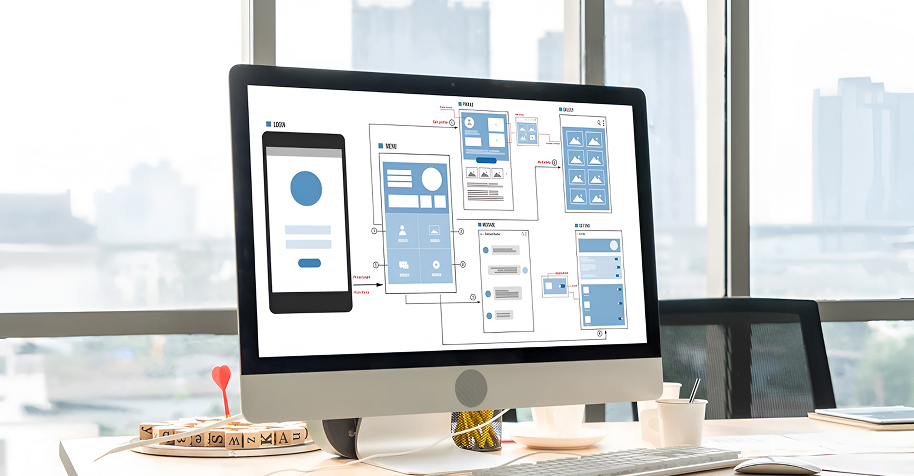
- Now, convert the best sketches into low-fidelity wireframes. You are advised to begin with Lo-Fi wireframes as you are at the initial stage of the development.
- In this stage, it is crucial to focus on structure, content, and flow rather than visuals.
- Keep screens minimal
- Use placeholder text.
- The goal here is to confirm navigation and flow.
Deliverable: wireframes including all flows.
6. Build a Lo-Fi Clickable Prototype
Timeframe: 2–7 days
It’s now time to build a clickable prototype. Make sure to have lo-fi fidelity at this stage. Here is what you need to do to build the prototype:
- Choose the prototyping tool (Choose the lo-fi prototyping tools at this stage)
- Stitch wireframes into a clickable prototype.
- Link screens to simulate navigation, error states, and alternate routes.
- Include basic copy that mirrors real content to reduce friction in testing.
- Test internally. You can run 3 to 5 quick dry-run tasks with your teammates to catch obvious issues (if any)
Deliverable: Clickable Lo-Fi prototype.
7. Run Early Usability Tests
Timeframe: 4–7 days
It’s now time to run early usability tests. In this stage, you will need to evaluate your design concepts with real users (or representative users) at the early stages of development, before you finalize the product.
The Goal: To see how easily users can navigate, understand, and interact with your prototype.
Here is what you need to do:
- Recruit a few (maybe 5 to 10) representative users for moderated tests.
- Give them realistic tasks, such as “navigate to your payment gateway” or “make a purchase.”
- Observe whether or not they can complete the task. Where do they hesitate? Watch for confusion, not just success/failure.
- Ask open questions, such as “What did you expect to happen?” “What was confusing?”
- Collect metrics, including task completion rate, time on task, and major usability issues.
- Collect feedback so that you know the flaws in the prototype itself.
Deliverable: test report with screenshots, quotes, and priority issues.
Running an early usability test helps you:
- Identify confusing layouts or flows before investing in expensive development.
- Validate whether the prototype meets user needs and expectations.
- Gather actionable feedback to refine features and design.
- Save time, reduce costs, and avoid rework later in the process.
To begin:
- Define your objectives
- Choose your fidelity tools
- Recruit representatives in advance
- Prepare the task in advance
8. Iterate Instantly
Timeframe: 2–5 days
After running usability tests, it is time to confirm whether or not ideas are working before the client invests heavily on the project. It should be done in a timely fashion to reduce risks by avoiding creating the wrong product.
Here is How to Iterate Quickly in Prototyping:
- Take issues by impact and effort.
- Fix critical flow blockers first.
- Re-run tests for changed flows (even 3–5 users will do).
- Keep a change log to document decisions and reasoning.
- Instead of going big all at once, make small, focused changes rather than large overhauls.
- Work in short sprints, adjusting features incrementally.
- Leverage Mid-Fidelity prototyping tools, such as Figma, Adobe XD, and InVision, for fast editing and sharing.
Deliverable: updated Lo-Fi or Mid-Fi prototype.
9. Build a Hi-Fi Prototype
Timeframe: 1–3 weeks
After you are done with iteration, it is now time to create a detailed, interactive and polished version of a product design. You are required to create a Hi-Fi prototype as it will you create a prototype that closely resembles the final application in every aspect, including look, feel, and functionality. Focus on refined visuals and clickable interactions. Here is how you can do it:
- Apply a visual design system, such as colors, typography, spacing and so on.
- Add realistic content, onboarding microcopy and empty states.
- Prototype interactions, such as drag-and-drop, animation timing, transitions and so on.
- You can even have a functional prototype or partial code if you need to validate backend or performance.
Deliverable: set up Hi-Fi interactive prototype for demos and formal usability testing.
Benefits:
- Allows you to bring the data to life
- Helps stakeholders and clients to understand the product better
- Enhances usability testing
- Allows you iterate quickly and refine
- Communication with developers is improved
- Helps save time and cost in the later stages
10. Validate with Broader User Tests or A/B Testing
Timeframe: 1–3 weeks
The next step in the process is to validate design decisions with broader user tests or A/B testing. Here are the steps you should take:
- Run larger or unmoderated tests with a larger and more diverse group of users, unlike early testers.
- Utilize user testing platforms or remote unmoderated studies to scale.
- If you wish to test alternative designs or two or more variations (A and B) of a prototype feature, then test in different user groups to measure preference and task performance or to compare which performs better.
- If the prototype is code-based, then consider a small beta with a limited release.
- Collect conversion indicators, such as sign-up completions, click behaviour and NPS-like willingness-to-pay questions.
Deliverable: validation report and go/no-go recommendation.
Why Should You Bother?
Because it
Validates whether design decisions work with broader user tests.
Helps avoid incorporating features users may not use or didn’t like or understand.
Provides quantitative insights along with qualitative feedback.
Helps make evidence-based decisions before investing heavily in full development.
11. Document & Hand Off to Engineers
Timeframe: 2–7 days
After you have taken all the steps outlined above, it’s time to prepare the material to hand over to engineers. It is one of the most important steps in prototyping. It ensures that the design vision is accurately translated into code. Also, it provides developers with all the necessary details, specifications that are required for faster development. Moreover, creating the right material helps bridge the gap between design and engineering. Here is how to prepare materials for engineers:
- Prepare final prototype with annotated flows and acceptance criteria.
- Include component library or style guide, including colors, spacing, type).
- Include APIs and data contracts, if the prototype used real data.
- Include edge cases, error states, and performance expectations.
- You can consider using collaboration tools, such as Figma inspect, Zeplin or Storybook to speed the process of handoff.
- Include prioritized backlog items and any known TODOs.
Deliverable: handoff package and sprint-ready stories.
Benefits:
There are many benefits of this step, such as:
- Helps reduce misunderstandings
- Saves a lot of time
- Ensures a smooth development process
- Prevents misinterpretation of design intent
- Provides engineers with clear functional and visual guidelines.
- Eliminates guesswork
- Speeds up development
- Helps maintain consistency in branding, interaction, and user experience.
Documents to Include:
- Design Specifications, such as layouts, spacing, typography, colors, icons, and branding rules.
- Interaction states, such as hover, pressed, disabled and so on.
- Step-by-step flow of how users move through the product.
- Diagrams or annotated screens showing interactions.
- Reusable UI elements like buttons, forms, and modals.
- Exported assets, such as icons, images, and illustrations
- Behavioral details such as how transitions, animations, or error messages should behave.
- Technical notes, such as integration points with APIs or back-end systems.
- Lastly, any constraints or dependencies that developers should be aware of.
Let’s now take a look at the common mistakes that often lead to wrong track in the process of creating a prototype. Here we go…
Common Mistakes in Creating a Software Prototype and Ways to Avoid Them
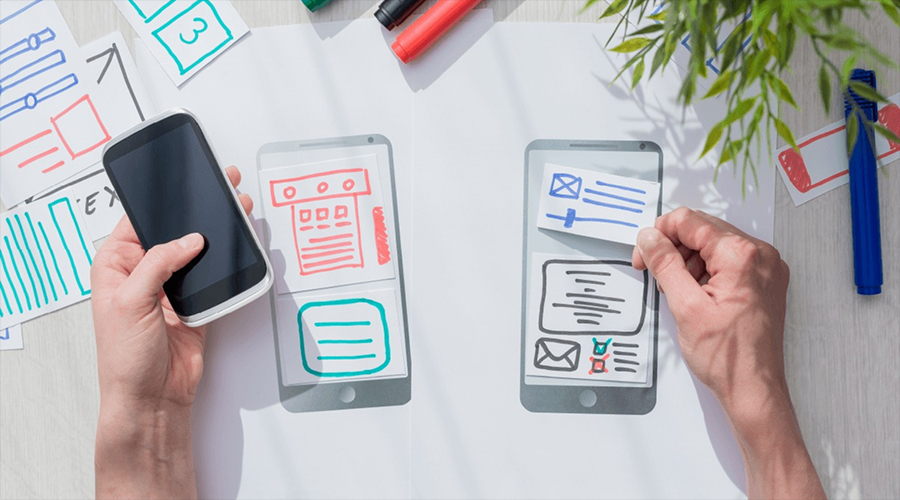
Here are some common mistakes associated with prototyping that you need to avoid. We have provided with ways as well. Take a look…
- Too much scope: Understand that the prototype is just a part, not the complete product.
- Skipping users: Building a product without testing with real users does not lead you to your goals at all. Hence, you are suggested to avoid building product based on opinion or imaginary users. Instead, test with real users early and often.
- Picking up the Wrong Fidelity or Tool: Picking up a tool based on your interest or because others are using it is the perfect recipe for disaster. You should always pick fidelity and tools based on the stage you are in.
- Over-Designing: There is no point investing time and effort in Hi-Fi fidelity when you actually need to work with Lo-Fi fidelity. Therefore, you are suggested to begin with low-cost experiments.
- Ignoring Edge Cases: Ignoring unusual, uncommon or error-prone situations that real users may still encounter can lead to the production of an incomplete or unusable final product. Hence, you are suggested to anticipate common failure points (invalid inputs, network errors, empty states) and include error states in wireframes/hi-fi prototypes, design fallback scenarios and test with diverse users.
- Not Having Measurable Goals: Without success measures, the prototype is arbitrary. Therefore, you are required to define hypotheses and metrics beforehand.
- Poor Handoff: Lastly, poor hand-off leads to the production of unusable or incomplete final product. Hence, it is crucial that you keep everything, from specs to collaboration tools, clear and well-versioned in the material that is to be handed over to engineers.
Quick Tips for the Right Prototyping
- Start with a one-page brief
- Use real content as early as possible
- Test with real users
- Test early and test often
- Prototype only what you’ll test
- Avoid building UI that won’t be validated
- Refine instantly based on feedback
- Timebox design and testing cycles
- Record usability sessions (with consent)
- Keep a decision log, which should include what you tested, the results and why you chose to change or not.
- Focus on clear documentation
- Validate with data
That’s all! Focus on these tips and you are good to go!
The Bottom Line
So, there you have it: the step-by-step guide to creating a software prototype. Hopefully, this article has been informative for you and helped you understand the process of prototyping in an easy and well-organized way. Prototyping is essential as it helps you learn rapidly. Moreover, a good prototype can significantly reduce uncertainty and bring you closer to a product people want and can use. You are advised to keep prototypes focused, measurable, and iterative. Also, it is crucial to pick the simple and workable tools that help you in the process of prototyping. If prototyping seems like a challenge or if you are struggling to create the right prototype, then contact us. At WeeTech, we help our clients with prototyping as well to let them have the right flow in hand and design the app that that they desire without any hassle.
It’s now time for some FAQs pertaining to prototyping. Take a look…
FAQs
Q1. How long does it take to build a software prototype?
Well, the time taken depends heavily on scope and fidelity. Altogether, you can create a software prototype in 1 to 12 weeks. For instance,
- If you are creating a Lo-Fi clickable prototype, it will take somewhere around 1 to 3 weeks.
- For creating a Hi-Fi prototype with validation, then you require around 3–8 weeks.
- For creating a functional prototype with integrations, you need somewhere between 6 and 12 weeks.
It is crucial to stick to the timeframe to ensure the timely creation of the prototype and further development.
Q2. How to measure success when prototyping?
Of course, measuring success is very important when creating a software prototype. Here is how you can measure success:
- For each prototype, track both qualitative and quantitative measures.
- Track usability, such as task success rate, time on task and error rates.
- Track engagement, such as time in flow, drop-off points, click paths, and so on.
- Desirability, such as user rating, Net Promoter Score, expresses willingness to pay.
- Business, including conversion to sign-ups, estimated revenue impact, retention proxies and so on.
A successful prototype is the one that not only answers the hard questions but also clearly informs next steps: build, pivot or stop.
Q3. When should I stop prototyping?
Here are the situations when you should stop prototyping:
- Your core hypothesis is validated or disproved, and you have data-driven next steps.
- Usability issues for the critical flows are below acceptable thresholds.
- You can reliably estimate engineering effort and risks.
- If tests show the idea is unlikely to succeed.
Q4. What should I do if the idea seems doubtful?
Stop! Yes, it’s time for you to stop and take a short break from the prototyping to rethink the right direction to take. There is no point in continuing to create a prototype when you already doubt it in the first place. A pause at this stage, when you are doubtful of the prototype you are creating, will save you a lot of time, effort and avoid developing an unusable product.
Q5. Can I take professional help in prototyping as well?
Yes, you can. WeeTech has a team of experts who can create a software prototype for you, keeping all your users’ needs and business goals in mind. You can contact WeeTech for more details.

