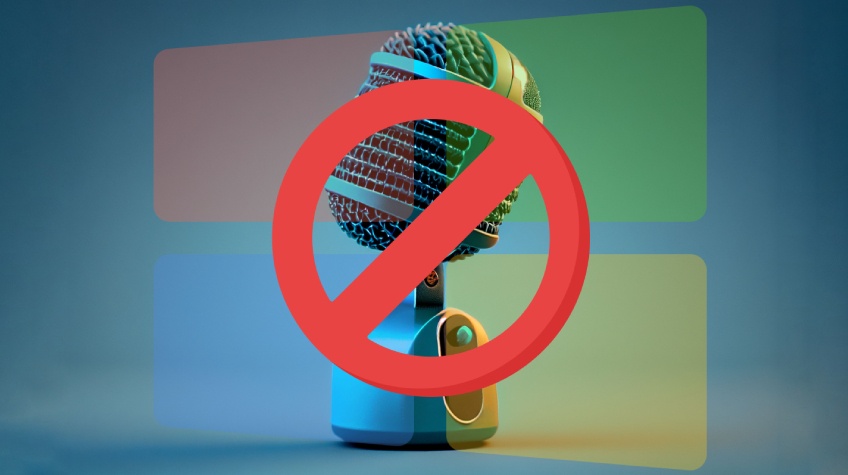
Hey there! From online meetings to listening to songs, everyone needs functioning microphones on their PC, don’t they? Yeah, a malfunctioning microphone can frustrate anyone. However, Microphone Not Working Windows 11 is one of the most common issues that a few Windows 11 users face. So, if you are also experiencing issues with your microphones, then you must read this post.
This is the guide that will help you fix your microphone in Windows 11. All you have to do is to follow the steps outlined in this post to check your microphone and communicate effectively. Remember, sometimes technology may trick you, so be patient and stay calm. Let’s dive in and get your microphone back in action.
Let’s get started…
GUIDE TO FIX MICROPHONE NOT WORKING WINDOWS 11
SOLUTION No. 1: Check the Connection
While fixing any device, the first and foremost thing to ensure is verifying the connection. Test it with various devices and repeat it until you confirm there are no connecting issues.
For instance, connect your PC to an external device and verify whether the microphone is working or not. And keep on repeating it with different devices, like earphones, so that you can confirm there is a fault.
Ensuring connections helps you make better decisions, and you can check out other solutions. Moreover, it spots other possibilities for the malfunction of the microphone.
If your connection is good and still, you’re facing the issue, then try out the next step.
SOLUTION No. 2: Perform A Basic Test
If you find no problem in your connection, then perform a basic test. Abundant reasons exist for the malfunctioning of microphones. It can be muted or due to any faulty hardware, so perform a basic test.
As mentioned above, check the physical connection and ensure the external microphone on your PC is plugged into the apt audio jack. Checking the input and output audio ports is a necessary basic test. Also, keep an eye on the USB ports and the mute switch in the microphone.
Performing these two steps provides you with information about the current status of the microphone. Thus, you can look ahead for other ways to resolve the non-working microphone in Windows 11.
SOLUTION No. 3: Enable Microphone
As the next step, you need to check the microphone settings. Sometimes, you might accidentally disable the microphone adapter. Access the device manager to check whether the microphone is enabled or not. Here are the steps to follow:
Step 1: Press the Windows key and type Device Manager to open it, or else press Windows + X to open the Power User menu and click Device Manager from the list.
Step 2: Double-click to expand audio inputs and outputs.
Step 3: Now, right-click on the microphone and select Enable Device from the three options.
When it is disabled, you can identify where the mistake is and enable the microphone. Now check the System by playing audio or clips.
If it is already enabled, then click disable and again enable it. Follow this step to avoid a malfunction of the microphone. Continue reading to find other solutions if nothing has worked for you so far.
SOLUTION No. 4: Verify Device Settings
Checking device settings is essential to ensure while fixing the microphone on Windows 11. Here is how you can verify device settings:
Step 1: Click the Windows key and type Change System Sounds to open it.
Step 2: Select the recording tab and click on the desired devices, like the microphone or headset, to select properties.
Step 3: You will get to see the Device Usage option at the bottom of the page. Check whether it is set to use this device (enable) or not.
Step 4: If it displays Do not use this device (disable), then click on the drop-down menu and enable it.
Step 5: Click on Apply and OK to save changes.
These steps are important to note when you connect multiple microphones to your PC. Thus, verify the settings to fix the microphone on Windows 11.
SOLUTION No. 5: Check the Audio Input Device Volume
At times, you might need to establish the default audio input for your preferred microphones. To verify the same, you will need to follow the steps below:
Step 1: Right click on the speaker icon in the Taskbar.
Step 2: Now, select Sound Settings from the menu.
Step 3: In the input option, choose the preferred microphone to check the volume.
Step 4: Check the audio input device volume to resolve the microphone issues on Windows 11.
SOLUTION No. 6: Analyze Privacy and Security
Analyzing privacy and security is yet another important step to take when fixing a microphone not working. It’s because people are more concerned about their privacy and security in today’s digital world. And they often check which application requires permission to access the microphone.
In a hurry, people might choose to disable instead of enable, so you can follow these steps to resolve this issue.
Step 1: Press the Windows key + I to launch settings, or else press the Windows key and open settings in the menu.
Step 2: Go to Privacy & Security.
Step 3: Now, scroll down to the App Permissions section and click the Microphone option.
Step 4: Check the microphone access and let apps access your microphone.
Step 5: Now verify the application’s permission to enable or disable the microphone. Make sure the toggle button near microphone access and let apps access your microphone is turned ON.
Step 6: Check the microphone now.
SOLUTION No. 7: Unmute Microphone
Besides checking the essential device settings, take a look at the mute and unmute options. It is an essential step to take because muting could be the most important reason for hearing issues.
Particularly, this technique is helpful during virtual meetings. Microsoft has introduced a universal mute button that lets you access the microphone directly from the Taskbar.
Many well-versed users are already aware of this simple thing; it’ll still help you when you’re in a rush. Follow these steps to unmute your PC quickly.
Utilize this shortcut to unmute the device during meetings, but once you release the keys, it will get back to the mute state again. Press Ctrl+Spacebar to unmute Windows 11. On the other hand, you can check the microphone’s condition with the help of the Universal Mute Button.
SOLUTION No. 8: Restart the Windows Audio Service
Another efficient way to fix the microphone not working is by restarting the audio service. Typically, everyone restarts the device if they encounter any issues, which is the first thing they do.
Windows Audio is responsible for managing the overall sound System on your PC. It could be a significant reason for interruptions or issues with the microphone. So try restarting the devices to fix the non-working microphone in Windows 11. Follow these steps to do so.
Step 1: Click the search icon, search for services, and press enter.
Step 2: In the Services window, you can search for Window Audio Service.
Step 3: Right-click on it; you can see the Restart option in the menu.
Step 4: Select Restart, and then click yes.
That’s it. Now check the microphone again; if it is working, then you can enjoy recording, speaking, and listening to music. After all, it didn’t work, so keep exploring to fix the microphone on Windows 11.
SOLUTION No. 9: Run Audio Troubleshooter
The Windows troubleshooter is an effective tool for resolving system-related issues, including diagnosing problems with the microphone not working. After following each of the steps mentioned above, such as enabling or disabling certain features and checking privacy and security settings, it is advisable to attempt troubleshooting. Here are the steps to follow:
Step 1: Hit the Windows key to search for Settings
Step 2: Open the settings menu and choose System from the listed menu
Step 3: Scroll down until you see the Troubleshoot section, and click on it
Step 4: Select other troubleshooters and scroll down to Recording Audio
Step 5: Click the Run button.
Now, your System automatically runs and inspects for issues that interrupt the functioning of the microphone in Windows 11. After a complete scan, you will see the list of issues along with the resolving instructions.
If there are no issues found, then you need to try other methods that fix the not-working microphone on Windows 11. Keep exploring and discovering other effective ways.
SOLUTION No. 10: Reinstall or Update Microphone Drivers
If none of the above solutions have not worked for you, then try reinstalling or updating microphone drivers. Old or missing drivers could be a great cause for microphone damage. So you can reinstall the drivers or update them. Want to know how? Follow these steps. Hope you all remember how to check the audio input device volume. It is quite similar to that. You can follow these steps to reinstall or update microphone drivers:
Step 1: Press the Windows key + S and type Device Manager in the search menu.
Step 2: In the Audio Inputs and Output section, right-click on the microphone and select Update Driver in the list.
Once you complete this, check and verify whether the microphone works properly. If not, then opt to reinstall it.
Step 1: Follow steps 1 and 2, but instead of selecting Update, choose Uninstall Device in the menu.
Ensure that you reinstall the missing drive after you uninstall it. It makes your PC’s audio System clearer than before it malfunctioned.
SOLUTION No. 11: Disable Exclusive Mode For Microphone
This may be surprising to you, but you should know that an application or program can also stop a microphone from functioning. Yes, it can. Prevent applications that take control of the microphone. Ensure these steps to disable this option.
Step 1: Press the Windows key + R to open the Run dialog.
Step 2: Type mmsys.cpl and press enter.
Step 3: You can witness four tabs; select the Recording tab.
Step 4: In the Recording tab, select the microphone and double-click on it to open the properties
Step 5: Under the Recording tab, there are four divisions; you need to select the Advanced tab.
Step 6: In the Advanced tab, you can see the option “Allow applications to take exclusive control of this device.” Uncheck the checkbox.
Step 7: Press OK, and then Apply to save changes.
It is another important method to fix the not-working microphone on your PC. Try it out and fix the malfunctioning microphone on your Windows 11.
Here are some frequently asked questions that strike through many users’ minds. Let’s know about them in detail.
Related Article: Not Showing Windows 11 Update: How to Fix the Error
FAQs
1. How to prevent not working microphone on Windows 11?
Check the battery and connection of wireless or wired external devices, keep track of the latest updates, ensure your System is free from viruses, and be aware of the status of microphone conditions.
These are some simple yet effective tips to enhance microphone functioning on Windows 11.
2. Is this a common problem?
It is the first and foremost thing that strikes through every user’s mind. However, you don’t need to panic because it’s a common issue. You can resolve it by following some easy steps, such as tweaking volume settings, headset connections, and app settings and ensuring the above-mentioned steps.
So if you encounter microphone issues in your Windows 11, then there is no need to rush to a service center; just fix it on your own.
3. Why is the Windows 11 microphone not working?
In general, there are many reasons available, and common issues are that the microphone is not connected or is loosely connected. It might be turned off; audio input could be muted on a Windows 11 PC or your headset. Incorrect microphones are selected, as are missing device drivers or faulty microphone hardware.
Try to check for these issues twice and ensure your microphone is connected properly. No matter what the issue, the good news is that you can fix it all by yourself.
4. How do I check the app permission that enables microphones in Windows 11?
Checking application permission settings is quite a simple thing because, in just 4 steps, every user can ensure it.
Click the Windows Start icon and tap Settings. Move into privacy and security, and then click on the microphone. You can witness the applications, which enable microphones on and off. Check it out, and be aware of the permission you give the apps to access the microphone.
5.How do I test the microphone on Windows 11?
Testing the microphone is quite simple; open the start menu to select settings. Choose the System option and select Sound. Now, you can see the properties menu for the mic, check input volume settings, and confirm the audio format system according to your needs.
Test your microphone, press the start test button, speak into the mic for 5 to 10 seconds, and stop the test. If the percentage is nearly 75%, then it is in a normal state.
Last few words
So, there you have it: solutions to fix microphone not working in Windows 11. Hope this article has been informative for you. You find the tips and tricks to troubleshoot your microphone in Windows 11 helpful. Whether you’re a professional who attends a lot of virtual meetings or a gamer who continuously plays, fix your microphone in Windows 11 with these steps. Addressing microphone issues on your PC is essential to maintaining seamless communication and connectivity. Stay calm; sometimes technology can trick you and make you wait for a while. Adjust settings, update drivers, and troubleshoot the microphone to fix it properly.


